How to Take a Screenshot on Windows for Tutorials, Reels, and YouTube Content
How Screenshots on Windows Help Content Creators Structure Workflows
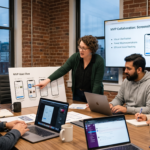
In tutorial-based content, structure is what separates clear guidance from confusing explanations. Whether creators are preparing short-form videos like Reels or longer YouTube content, they need to understand what exactly will be shown on screen and in what sequence. This is where a simple Windows screenshot becomes part of the workflow, not just a quick capture tool.
This guide shows how to take a screenshot on Windows and use it effectively for tutorials, YouTube videos, and visual content creation.
Using screenshots to plan content before recording
Understanding how to take a screenshot on Windows allows creators to capture key moments in advance: interface states, settings, or results that will later appear in the video. Instead of figuring everything out during recording, creators build a visual outline of the process. These captures act as reference points that help maintain consistency and prevent missed steps, especially in tutorials where each action needs to be clearly explained.
Breaking workflows into clear visual steps
When a tutorial involves multiple actions or transitions between screens, relying only on continuous recording can make the content harder to follow. A well-timed screenshot on Windows allows creators to isolate specific steps and present them as clear visual checkpoints. This approach makes it easier for viewers to understand what is happening at each stage, whether it’s a fast-paced Reel or a more detailed YouTube tutorial.
Combining screenshots with screen capture for better flow
In practice, creators rarely rely on just one format. A Windows desktop screenshot is often used alongside screen capture Windows recording to balance clarity and continuity. Screenshots highlight key moments, while recordings show the full interaction. Together, they create a more structured and easier-to-follow narrative, without overloading the viewer with unnecessary detail.
Improving speed and consistency in content production
As creators repeat this process across different projects, Windows screenshots become a natural part of their workflow. They help define the sequence of actions, support the logic of the tutorial, and make the recording process more predictable. Instead of capturing everything in one take, creators rely on screenshots to guide the flow of content and ensure that each step is presented clearly.
In this context, a screenshot on Windows is no longer just a static image. It becomes a practical tool for structuring tutorials, improving clarity, and making content production more efficient.
How to Take a Screenshot on Windows for Clear Tutorial Steps and Visual Guides
In tutorial content, knowing how to take a screenshot on Windows is only useful if it clearly communicates a specific action or result. Simply capturing the screen is not enough, the way a screenshot on Windows is taken directly affects how easy the tutorial is to understand. This is especially important when creating visual guides, where each step needs to be instantly recognizable.
Understanding how to take a screenshot on Windows for tutorials means choosing the right capture method for each situation. For example, when recording a YouTube tutorial about a software feature, capturing only the relevant part of the interface, such as a settings panel or a selected option, makes the explanation much clearer than showing the entire screen with unnecessary elements.
In practice, small capture decisions can significantly improve how clear your tutorial looks. For example, capturing UI at 100% zoom helps avoid blurry or distorted visuals, especially when viewers watch on larger screens. For YouTube content, using a 16:9 crop ensures that screenshots fit naturally into the video frame without additional resizing. It’s also best to avoid full-screen captures in most tutorials, as they often include unnecessary elements that distract from the main action.
In practice, creators often rely on tools that allow precise region capture and quick adjustments without interrupting the workflow. Alongside built-in Windows tools, creators may also use solutions like PixelTaken: a screenshot and screen recording tool that combines capture, basic editing, and recording in one place. It is also a multi-platform tool, working across different operating systems, which makes it convenient for creators who switch between devices or work in mixed environments. This makes it easier to quickly select the exact part of the screen, annotate key elements if needed, and prepare visuals for tutorials without switching between multiple applications.
How to Take a Screenshot on Windows (Quick Methods)
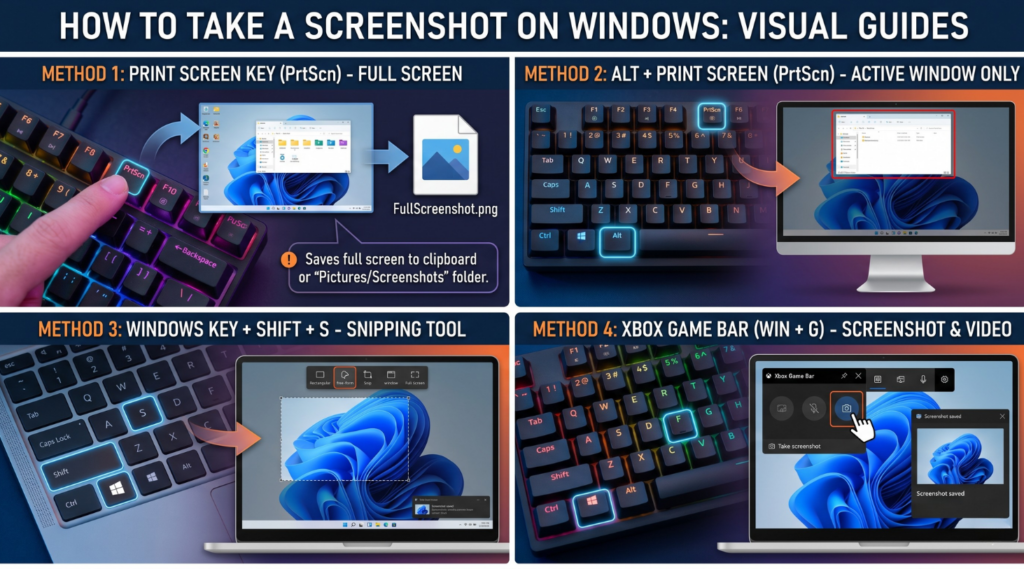
If you’re creating tutorials or video content, knowing how to take a screenshot on Windows quickly can save time during both preparation and recording. Windows includes several built-in methods, each suited for different types of captures.
Win + Shift + S (Best for precise captures)
This shortcut opens the Snipping Tool overlay and lets you select exactly what to capture. It’s ideal for tutorials where you need a clean screenshot on Windows focused on a specific UI element, setting, or result.
PrtSc / Alt + PrtSc (Fast full or window capture)
-
- PrtSc captures the entire screen
-
- Alt + PrtSc captures only the active window
These methods are useful when you need a quick Windows screenshot without selecting an area, especially for full-layout views.
Snipping Tool (More control and flexibility)
The built-in Snipping Tool Windows allows you to capture, edit, and save screenshots in one place. It’s helpful when working on multiple screen capture Windows assets and keeping them organized during content preparation.
In practice, most creators combine these methods depending on the situation. Quick shortcuts are used for speed, while more precise tools help produce cleaner visuals for tutorials and YouTube content.
These methods work consistently across Windows 10 and Windows 11, making them reliable for most tutorial and content creation workflows.
Choosing the right capture type for each tutorial step
Different types of content require different approaches to a Windows screenshot. In most cases, screenshots are used in desktop-based tutorials, where clarity and precision are critical. A focused capture, for example, showing a specific result, UI state, or key action, helps guide the viewer without unnecessary distractions.
In step-by-step YouTube guides, screenshots are often used to break down more complex flows. For instance, when explaining how to configure an app, a creator might capture each stage: opening the menu, selecting a setting, and confirming the result, and then use those images to build a clear visual sequence. This turns a simple screen capture Windows process into a structured guide that viewers can easily follow at their own pace.
In short-form content like Reels, most of the creation and editing typically happens on mobile. However, when the content involves desktop tools or software workflows, creators may still use a screenshot on Windows to capture key moments, such as results, settings, or interface states and incorporate them as supporting visuals in the final video.
Consistency also plays an important role. When multiple screenshots are used in a single tutorial, they should feel visually connected. Using a consistent Windows desktop screenshot style, with the same scale, alignment, and focus, helps create a smoother experience, especially in longer YouTube content where viewers rely on visual continuity.
Timing is another key factor. In some cases, capturing the final state of an action, such as a completed setup or a visible result is more useful than showing the interaction itself. In others, especially in tutorials for beginners, showing both the action and the result helps avoid confusion.
Finally, screenshots become even more effective when combined with short recordings. For example, a creator might use a static screenshot on Windows to highlight a key setting, and then follow it with a short clip that shows how to reach that point. This approach works particularly well in tutorials, where balancing clarity and flow is essential.
In this context, taking a screenshot on Windows is not just a technical step. It is a way to guide attention, simplify complex actions, and turn raw screen content into clear, structured visual instructions that are easier to follow across tutorials, YouTube content, and, in some cases, supporting visuals for short-form formats.
Using Windows Screenshots to Build and Script YouTube Tutorials
When producing YouTube tutorials, one of the biggest challenges is dealing with long recordings that include navigation, repeated actions, and moments that do not add value to the viewer. This makes editing slower and the final video harder to follow.
Using screenshots to define key moments in a tutorial
A common YouTube scenario involves explaining a multi-step process inside a desktop application, for example, setting up a feature, configuring a tool, or completing a workflow. In these cases, creators often capture specific interface states, such as a selected option or a final result, as a screenshot on Windows and use those visuals as anchors for the explanation.
For instance, a creator might capture the initial state of the interface before any changes, take another screenshot after applying a key setting, and then capture the final result that viewers should achieve. These visuals are later inserted into the timeline during editing, allowing the creator to move directly between meaningful steps instead of showing the entire interaction.
To make these visuals more effective in editing, creators often apply simple techniques. For example, using a slight zoom-in on screenshots helps focus attention on key elements without needing to re-record the interaction. Keeping all screenshots at the same scale and alignment also improves visual consistency across the video, which is especially important in longer YouTube tutorials.
Another important part of this process happens even before recording begins. When preparing a script, creators often look for references: watching how other experts present similar topics, how they structure steps, and which interface states they choose to highlight. In some cases, they may capture a Windows screenshot during their own testing or research to better understand how to present a specific step clearly. These screenshots are then used as a guide when building their own tutorial flow.
Reusing visuals across edits, updates, and multiple videos
In YouTube production, screenshots serve a different purpose: they act as reusable assets. A Windows desktop screenshot can be inserted into multiple videos, reused across edits, or replaced without affecting the rest of the content.
For example, if part of a tutorial needs to be updated, the creator can swap a single visual instead of re-recording the entire sequence. This is especially useful when only a small part of the interface changes, while the overall process remains the same.
Screenshots are also commonly used as overlay elements. A creator may insert a screen capture Windows image into the video, zoom into a specific area, and highlight it while explaining. This allows precise control over what the viewer sees, without depending on cursor movement or perfect timing during recording.
Tools can simplify this process. In addition to standard Windows options, PixelTaken can be used to handle both screenshots and recordings more efficiently. This is especially useful when working on YouTube tutorials, where the same interface elements may appear across multiple scenes, edits, or even different videos. This becomes especially important in tutorial series, where maintaining visual consistency across multiple videos directly affects how professional and easy-to-follow the content feels.
As a result, a screenshot on Windows becomes part of the YouTube production pipeline. It allows creators to reduce unnecessary footage, reuse visuals efficiently, and maintain full control over how each step of the tutorial is presented.
When Video Screen Capture on Windows Works Better Than Static Screenshots
Most creators start with simple Windows screenshots to explain key steps or show final results in tutorials. A screenshot on Windows works well for fixed states, such as settings, interface layouts, or completed actions. However, there are many situations where static images are not enough.
In these cases, video screen capture Windows becomes essential. Instead of showing just the result, it allows creators to demonstrate how something actually works including interaction, timing, and movement.
Showing interactions, navigation, and dynamic behavior
Video capture is essential when the process depends on interaction. For example, when demonstrating how to navigate through menus, drag elements, or complete a multi-step flow, a static Windows screenshot cannot fully capture the logic of the action.
This is particularly relevant in tutorials that involve:
-
- UI animations (dropdowns, hover states, transitions);
-
- navigation between multiple screens;
-
- actions that depend on timing or sequence.
In these cases, screen capture Windows recording helps show not just what happens, but how it happens. The viewer can follow the exact movement, which makes the tutorial easier to replicate.
Another common scenario is onboarding or walkthrough content. When introducing a new feature, creators often need to show the full journey: from the starting point to the final result. A static image might show the outcome, but only video can demonstrate the path.
Combining video and screenshots for clearer tutorials
In practice, the most effective tutorials combine both formats. Static screenshots are used for clarity and focus, while video is used for motion and interaction. Knowing when to switch between them is what makes content feel polished and easy to follow.
For example, a creator might:
-
- use a screenshot on Windows to highlight a key setting;
-
- switch to video to demonstrate how to reach it;
-
- return to a static frame to explain the result.
This approach keeps the content structured without overloading the viewer with continuous recording.
While Windows includes solid built-in tools, creators may also use alternatives like PixelTaken when they need more control over how recordings are captured. This can be useful in tutorials where it’s important to clearly show interactions, cursor movement, or voice explanations alongside on-screen actions. It is not about replacing default Windows tools, but about having another convenient option when a more flexible recording setup is needed.
Organizing Windows Screenshots and Screen Recordings for Faster Content Production
When working on tutorials or YouTube videos, the biggest slowdown often happens not during recording, but during editing. Screenshots and recordings get mixed together, and it becomes unclear which format is better for each part of the video. Organizing Windows screenshots and recordings is not just about folders, it’s about deciding how each visual should be used in the final content.
A more effective approach is to treat screenshots and recordings as different types of assets with specific roles in the editing process. Choosing the right format for each situation makes the video clearer and significantly faster to produce.
When to use screenshots vs recordings in the editing workflow
| Content Situation | Best Format | Why It Works Better |
| Showing final result or outcome | Screenshot on Windows | Instant clarity without extra motion |
| Highlighting a specific UI element | Screenshot on Windows | Easier to zoom, annotate, and control focus |
| Explaining step-by-step navigation | Video screen capture Windows | Shows flow and sequence naturally |
| Demonstrating interactions (clicks, drag, hover) | Video recording | Captures motion that static images miss |
| Creating quick visual pauses in video | Screenshot | Gives viewer time to process information |
| Comparing before vs after states | Screenshots | Easier to display side by side |
| Showing a full workflow from start to finish | Screen capture Windows | Keeps context and continuity |
| Reusing visuals across multiple videos | Screenshots | Faster to insert and adapt |
Features in PixelTaken that can simplify content creation workflows
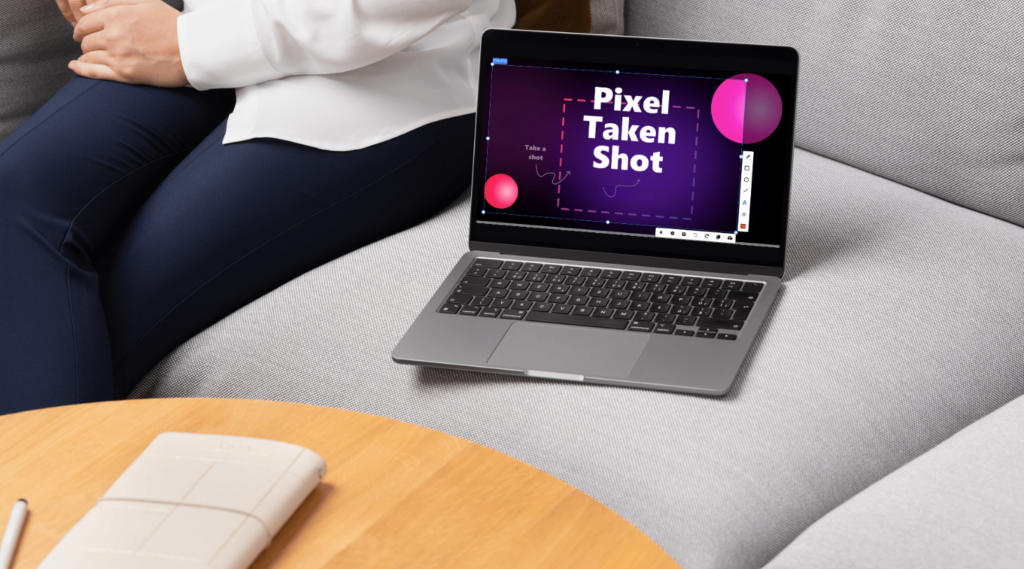
Alongside built-in Windows tools, some creators use additional software when they need more flexibility while working with screenshots and recordings. PixelTaken is one example, combining screenshot capture, screen recording, and basic annotation tools within a single interface.
For tutorial creators, one practical feature is the ability to choose between fullscreen, window, or area-based recording depending on the type of content being created. Instead of recording the entire screen every time, creators can focus only on the part of the interface that matters, which helps keep tutorials cleaner and easier to follow.
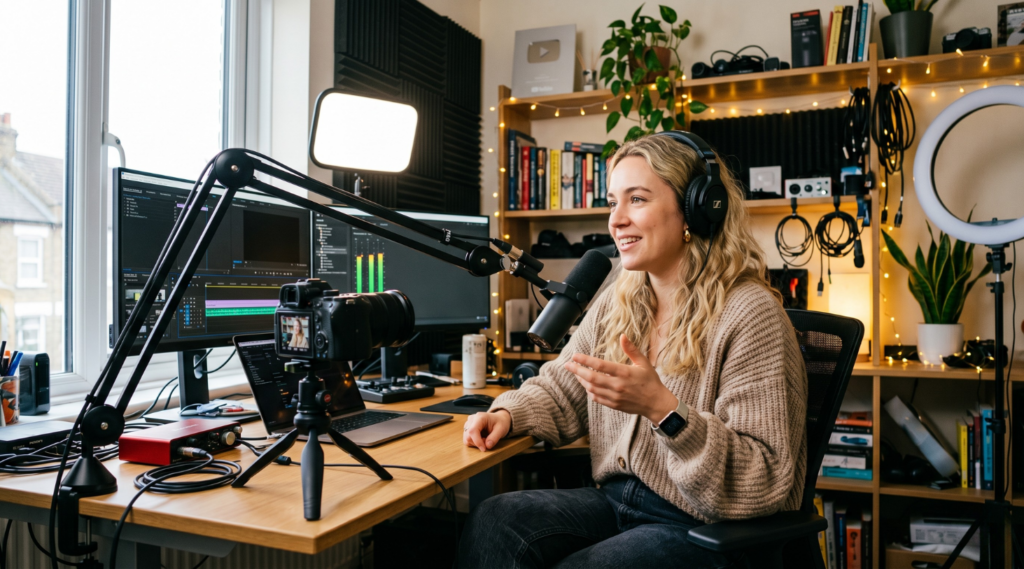
The tool also supports microphone audio, system sound, webcam capture, and mouse cursor. This is useful in YouTube tutorials or walkthrough videos where creators need to explain actions in real time while showing cursor movement or adding voice commentary.
Another advantage is the ability to quickly annotate screenshots after capture. Features like arrows, highlights, shapes, text, and blur effects help emphasize important UI elements without moving screenshots into separate editing software.
PixelTaken also includes options to upload recordings to the cloud automatically or save them locally, making it easier to manage multiple takes, drafts, or reusable tutorial assets during editing and review.
In practice, tools like PixelTaken are used when creators need more control over how visuals are captured and prepared, especially in workflows that involve tutorials, recordings, and reusable visual assets.
In modern content creation, screenshots and screen recordings are more than just technical tools, they define how tutorials are structured, edited, and delivered. Understanding when to use each format, and how to organize them effectively, helps creators produce clearer and more engaging content.
Whether using built-in Windows tools or additional solutions, the key is building a workflow that supports speed, clarity, and consistency across all types of content.