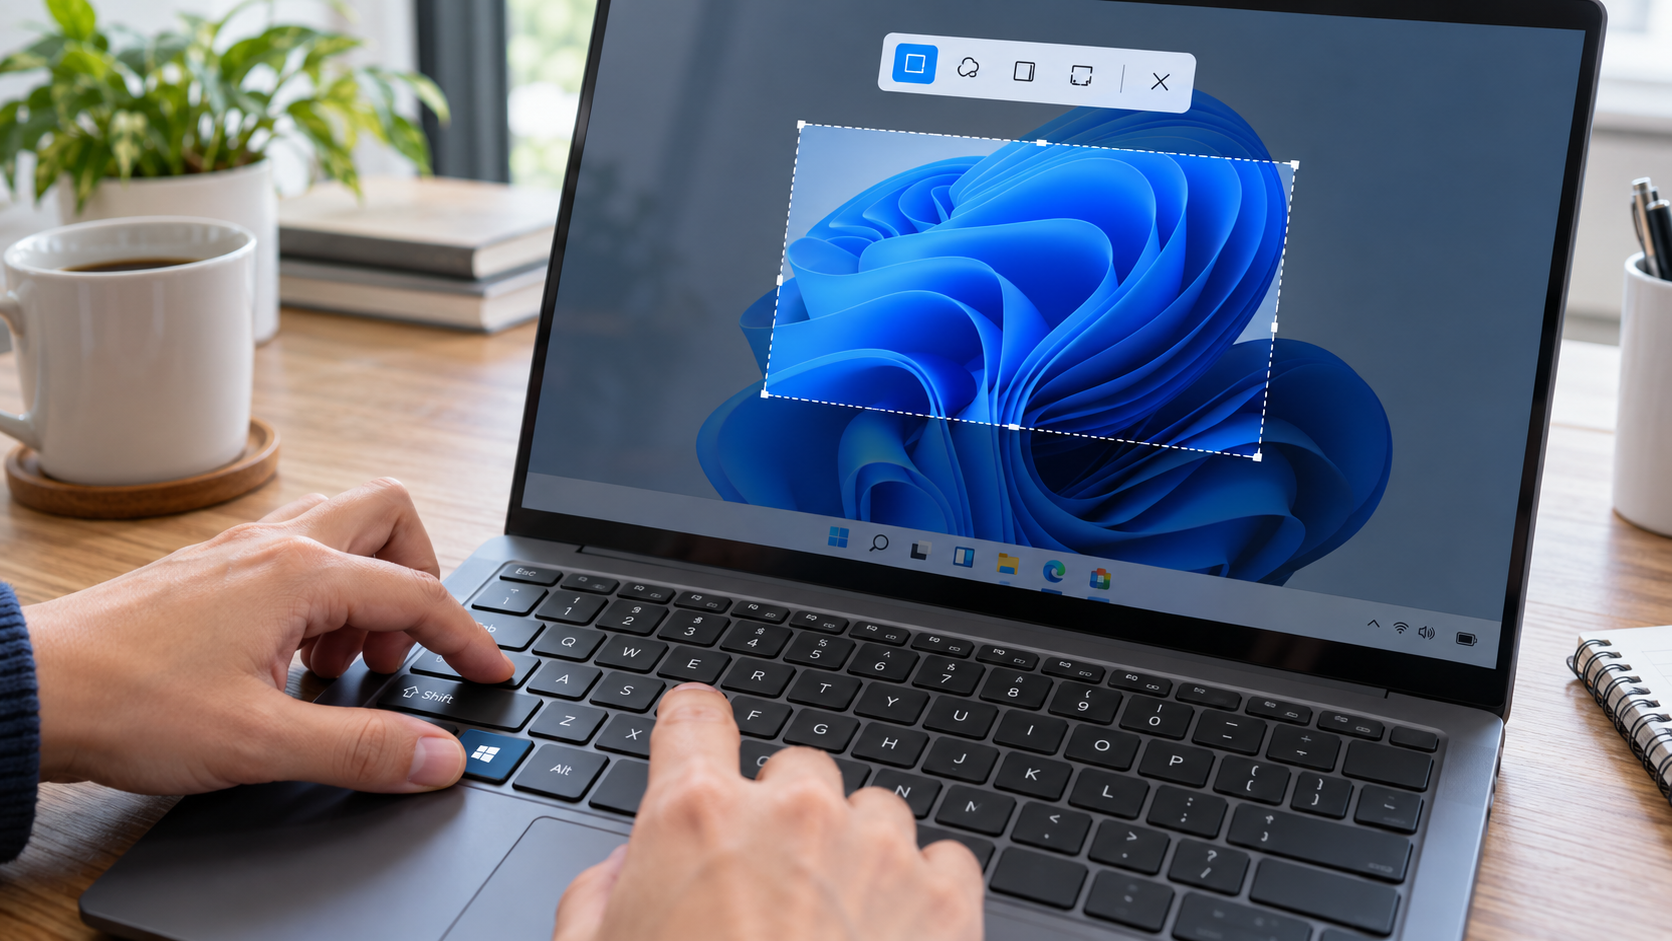
How to Fix Snipping Tool in Windows 11: 10 Solutions for Win + Shift + S
If the Snipping Tool is not working in Windows 11 or Win + Shift + S does not open the capture overlay, the problem may involve the keyboard shortcut, clipboard, notifications, app package, or Windows system files. This guide explains how to fix Snipping Tool in Windows 11 using ten solutions arranged from quick checks to reinstalling the app and running DISM and SFC.
Why the Snipping Tool Shortcut Stops Responding in Windows 11
When users search for how to fix Snipping Tool in Windows 11, they often assume that the built-in Microsoft screen capture tool is completely broken. In practice, Win + Shift + S depends on several Windows components working together. The keyboard must register all three keys, Windows must activate the capture overlay, the Snipping Tool must process the selected area, and the finished screenshot must reach the application, clipboard, notification panel, or storage folder.
A failure at any stage can make the shortcut appear unresponsive. Before resetting or reinstalling the application, it is therefore important to determine whether the problem affects the keyboard shortcut, the Snipping Tool application, or what happens after the screen has been captured.
PixelTaken can keep screenshot work moving while the cause is being diagnosed. Because it uses a separate Windows application workflow, users can continue creating captures without depending on the Snipping Tool package. However, it does not repair the native Win + Shift + S shortcut, so the checks below are still necessary when that specific Windows feature must be restored.
A Shortcut Failure Is Not Always a Snipping Tool Failure
Microsoft identifies Win + Shift + S as the standard shortcut for opening the screenshot overlay in Windows 11. However, the shortcut and the application can fail independently. Although Snipping Tool serves as the default Windows screen snipping tool, it can still open normally from the Start menu when its keyboard shortcut stops responding.
If this Windows screenshot capture tool opens from Start and creates an image after the user selects New, the application itself is operational. In this situation, a Snipping Tool shortcut not working usually points to the keyboard, Windows shortcut handler, or another application intercepting the key combination.
If Snipping Tool won’t open from either the shortcut or the Start menu, the problem is more likely connected to a stalled process, an incomplete Microsoft Store update, damaged application data, or another Windows component required to launch the app.
The following symptoms help narrow down the failure:
| What happens | Where the problem is likely located |
| Nothing happens after pressing Win + Shift + S, but Snipping Tool opens from Start | Keyboard input, Windows-key lock, shortcut remapping, or software conflict |
| Neither the shortcut nor the application opens | Snipping Tool process, application package, or Windows update |
| The capture overlay appears, but the screenshot cannot be pasted | Clipboard or post-capture processing |
| The screenshot is created, but no preview appears | Notifications or Do Not Disturb settings |
| Capture works in most programs but fails in one window | Protected content or an organizational screen-capture policy |
Common Reasons Win + Shift + S Stops Responding
Not every failure indicates a defect in the Snipping Tool. On managed work computers, administrators may restrict screen capture inside protected applications, remote sessions, or environments that display sensitive information. If the shortcut works elsewhere but fails only in one program, the limitation may be intentional rather than caused by a broken application.
The remaining causes can be distinguished using the symptom table above. Match the visible behavior to the appropriate troubleshooting section instead of applying every fix in sequence. This limits unnecessary Windows changes and makes it easier to determine whether the issue affects only the shortcut, the Snipping Tool application, or the wider operating system.
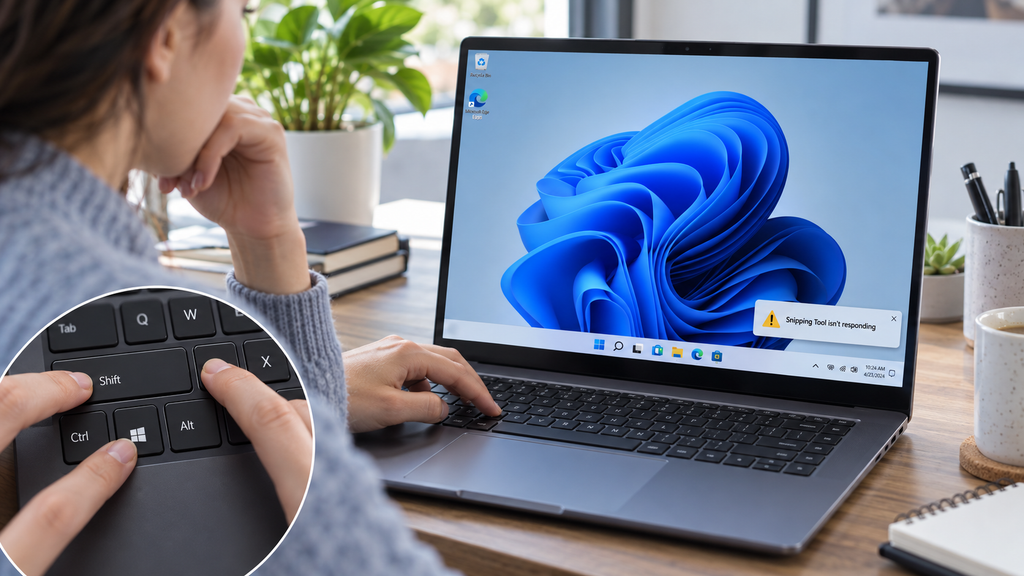
How to Restore Win + Shift + S and the Snipping Tool Overlay
If the failure is limited to the keyboard shortcut or capture overlay, begin with the reversible actions below. They do not remove screenshots, erase Snipping Tool settings, or reinstall the application.
Solution 1: Restart Snipping Tool and Windows Explorer
Closing the Snipping Tool window does not always terminate its background process. To restart it completely:
- Press Ctrl + Shift + Esc to open the Task Manager.
- Find Snipping Tool under Processes.
- Select it and choose the End task.
- Close Task Manager and press Win + Shift + S.
If the overlay still does not appear, restart Windows Explorer. This process controls the desktop, taskbar, and parts of the Windows interface used to display system overlays.
Return to Task Manager, find Windows Explorer, right-click it, and select Restart. The taskbar and desktop icons may disappear briefly while the Windows shell reloads. Once they return, test the screenshot shortcut again.
This step is particularly useful when other Windows interface elements are also slow or unresponsive. It refreshes the shell without closing regular applications or resetting Snipping Tool.
Solution 2: Check the Windows, Shift, and S Keys
When the Snipping Tool shortcut is not working, verify that Windows can register each part of the combination. A single malfunctioning or disabled key prevents the complete command from reaching the operating system.
Windows includes anOn-Screen Keyboardthat can be enabled through:
Settings – Accessibility – Keyboard – On-Screen Keyboard
Use the virtual Windows, Shift, and S keys to launch the capture overlay. If the shortcut works from the On-Screen Keyboard, the problem is connected to the physical keyboard or its configuration.
Check whether the keyboard has a Windows-key lock or a dedicated gaming profile. These features are commonly controlled by a hardware button, key combination, or manufacturer utility and can disable Windows shortcuts without affecting regular typing. Re-enable the Windows key and test Win + Shift + S again.
For an external keyboard, reconnect the device or try a different USB port. Laptop users can compare the built-in keyboard with an external one. These tests help determine whether Win Shift S not working is a Windows issue or an input-device problem.
Solution 3: Remove Shortcut Remapping and Hotkey Conflicts
Keyboard customization utilities can change how Windows interprets shortcut combinations. If Microsoft PowerToys is installed, open:
PowerToys Settings – Keyboard Manager
Review both Remap a key and Remap a shortcut. Remove any mapping that changes the Windows, Shift, or S keys, or temporarily disable Keyboard Manager. According to Microsoft’s Keyboard Manager documentation, remapped keys and shortcuts remain active while PowerToys is running in the background.
Third-party Windows screen capture software, clipboard managers, automation tools, and keyboard utilities may also register global hotkeys. Closing only the visible window may not release the shortcut because the application can continue running in the system tray.
Fully exit these applications and test Win + Shift + S. If the overlay returns, reopen the programs one at a time until the conflict appears again. The conflicting application can then be assigned another hotkey instead of being uninstalled.
After each change, press Win + Shift + S from the Windows desktop. A restored shortcut should dim the screen and display the capture toolbar. If the overlay remains absent, skip to the app update and repair section. If the overlay appears but the finished capture is missing, continue with the post-capture checks below. For an immediate capture, users can launch PixelTaken, which does not depend on the Snipping Tool overlay.
What to Check When Snipping Tool Captures Are Not Copied, Previewed, or Saved
Once an area has been captured, the remaining task is to restore delivery of the finished image. The clipboard, preview notification, and file-saving process can operate independently, so each output should be tested in sequence.
Solution 4: Check Whether the Screenshot Reached the Clipboard
Immediately after selecting an area, open Microsoft Paint, Word, an email, or another application that accepts images and press Ctrl + V. If the screenshot appears, Snipping Tool completed the capture correctly. The missing preview or file should then be addressed separately.
When the Snipping Tool is not copying to the clipboard, press Win + V to open Clipboard History. If the feature has not been enabled, Windows will display an option to turn it on. Clipboard History is not required for pasting the most recently copied item, but it makes it easier to confirm whether Windows received the screenshot and retain several recent captures.
If new screenshots do not appear in either the current clipboard or its history, clear the existing clipboard data:
Settings – System – Clipboard – Clear clipboard data
This removes unpinned clipboard items, so any important content should be pasted or pinned before selecting Clear. After clearing the data, create another small screenshot and test Ctrl + V again.
Microsoft notes that Clipboard History supports bitmap images up to 4 MB per item. A large capture may therefore be available as a saved file or inside Snipping Tool without appearing in the history. For this reason, the direct paste test should be completed before assuming that the capture itself failed.
Solution 5: Restore the Snipping Tool Preview Notification
A completed screenshot normally generates a notification that can be selected to open the image in the Snipping Tool. When the Snipping Tool notification is not showing, the screenshot may still exist even though no banner appears.
Open:
Settings – System – Notifications
Confirm that Windows notifications are enabled, locate the Snipping Tool in the application list, and turn on its notifications and notification banners. Then check whether Do Not Disturb is active.
Windows can enable Do Not Disturb automatically at scheduled times, while using a full-screen application, when duplicating a display, during a game, or after certain Windows updates. In these situations, the Snipping Tool notification may be delivered directly to the Notification Center without appearing as a banner.
Temporarily disable Do Not Disturb and create another capture. If the preview returns, Snipping Tool can be added to the allowed priority applications instead of leaving all notifications unrestricted. These options are available under:
Settings – System – Notifications – Set priority notifications
Restoring the preview notification changes only how the finished capture is presented. It does not modify the screenshot shortcut or the image itself.
Solution 6: Verify Automatic Saving and the Destination Folder
Current Windows 11 versions of Snipping Tool can automatically save original screenshots. Open the Snipping Tool, select the three-dot menu, and go to Settings. Confirm that automatic saving is enabled and review the destination assigned to the Screenshots folder.
For a detailed explanation of local, redirected, and OneDrive-backed screenshot locations, see the PixelTaken guide explaining whereWindows screenshotsgo.
When the Snipping Tool is not saving screenshots, open the captured image inside the application and use Ctrl + S or Save as. Choose a simple local destination such as the Desktop.
If manual saving works, the problem is limited to the automatic save setting, original destination, or a synchronized folder. If saving also fails on the Desktop, check the available disk space and whether Windows Security or an organizational policy prevents the application from writing files.
Testing the clipboard, notification, and file output separately avoids applying unrelated repairs. If reliable saving and sharing are the immediate priorities, PixelTaken can keep screenshots as local files or upload them to the cloud for organization and link sharing. If the goal is to restore Snipping Tool itself, the next stage of how to fix Snipping Tool in Windows 11 is to update the application and use its built-in Repair or Reset options.
How to Update, Repair, and Reset Snipping Tool in Windows 11
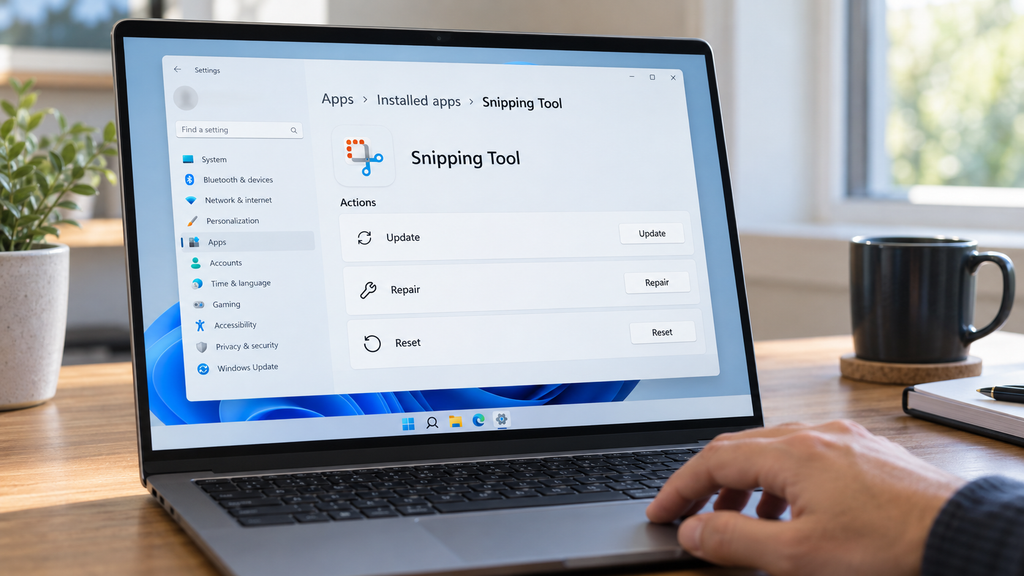
When the capture workflow has been ruled out, the application package becomes the next troubleshooting layer. The safest order is to update the app first, use Repair if the problem remains, and reserve Reset for the final step. After completing each stage, repeat one capture and stop once normal operation is restored.
Solution 7: Update Snipping Tool Through Microsoft Store
Snipping Tool is distributed through Microsoft Store, so it can receive fixes separately from major Windows updates. An outdated app version may be relevant when the Snipping Tool won’t open, closes unexpectedly, or produces inconsistent results.
To update Snipping Tool in Windows 11:
- Open Microsoft Store.
- Select Library.
- Click Get updates or Check for updates, depending on the Store version.
- Install the available update for Snipping Tool.
- Close and reopen the application.
Next, open Settings – Windows Update and select Check for updates. Install any pending updates and restart the computer if Windows requests it. Checking both sources matters because the Snipping Tool and the Windows components it uses may be updated separately. Microsoft includes these steps in itsofficial guidancefor troubleshooting Store apps.
Solution 8.1: Repair Snipping Tool Without Clearing Its Settings
If installing the latest versions does not resolve the issue, Windows can attempt to repair the existing app package. This option addresses damaged or incomplete application files without returning Snipping Tool to its default configuration.
To repair Snipping Tool in Windows 11:
- Open Settings – Apps – Installed apps.
- Find a Snipping Tool.
- Select the three-dot menu beside the app.
- Open Advanced options.
- Scroll to the Reset section and click Repair.
Repair should be used before Reset because it is designed to preserve the app’s existing data and preferences. The same route is documented inMicrosoft’s guideto repairing apps and programs in Windows.
Solution 8.2: Reset Snipping Tool Only If Repair Does Not Work
Reset is appropriate when the application remains unstable after an update and repair. Save any open captures before proceeding because the app will close during the process.
To reset Snipping Tool in Windows 11:
- Return to Settings – Apps – Installed apps – Snipping Tool – Advanced options.
- Select Reset and confirm the action.
- Open the Snipping Tool from the Start menu after the reset is complete.
- Review any preferences that were previously changed.
Unlike Repair, Reset removes the app’s local data and restores its default settings. It does not perform a complete reinstallation, so saved image files outside the application remain separate from this process.
For users researching how to fix Snipping Tool in Windows 11, this update–repair–reset sequence resolves the app-level causes without immediately removing the application. Because PixelTaken can remain installed alongside Snipping Tool, it can handle time-sensitive captures, annotations, and privacy blurring while the Microsoft app is being updated, repaired, or reset. If the problem continues afterward, the next stage is a clean Snipping Tool reinstall followed by checks for damaged Windows system components.
How to Reinstall Snipping Tool and Resolve System-Level Windows Errors
When app-level recovery does not restore normal operation, the next step is to replace the installed package and check the Windows components on which it depends. Reinstallation goes further than Reset: instead of restoring the existing application to its default state, it removes the package and installs a fresh copy.
Solution 9: Remove and Reinstall the Snipping Tool Package
To reinstall Snipping Tool in Windows 11:
- Open Settings – Apps – Installed apps.
- Find a Snipping Tool.
- Select the three-dot menu and click Uninstall.
- Confirm the removal.
- Download the appropriate Snipping Tool installer fromMicrosoft’s officialreinstall page.
- Run the installer and follow the setup instructions.
Most Windows 11 computers with Intel or AMD processors require the 64-bit installer. Devices powered by an ARM processor, including some Snapdragon PCs, require the ARM64 version. The processor type is listed under Settings – System – About – System type.
A successful Snipping Tool reinstall replaces the application package and its registration data. If the original problem remains after installation, continue with the Windows integrity checks below.
On a company-managed device, the Uninstall option may be unavailable because application changes are controlled by an administrator. In that case, contact the IT team instead of attempting to force the removal with unofficial PowerShell commands.
Solution 10.1: Repair the Windows Component Store With DISM
Snipping Tool relies on Windows libraries and system services that are not replaced when the application itself is reinstalled. Corruption in these components can prevent the new package from operating correctly.
Open Windows Terminal (Admin) or Command Prompt as administrator, then run:
DISM.exe /Online /Cleanup-Image /RestoreHealth
Keep the window open until the operation finishes. The progress indicator may remain at the same percentage for several minutes without indicating that the process has stopped.
The DISM RestoreHealth command checks the Windows component store and replaces damaged components when suitable repair files are available. Microsoft recommends completing DISM before running System File Checker.
Solution 10.2: Check Protected Windows Files With SFC
Once DISM reports that the operation has completed, use the same administrator window to run:
sfc /scannow
The SFC scannow command examines protected Windows files and replaces corrupted copies where possible. Do not close the terminal before verification reaches 100%.
The final message will indicate whether Windows:
- found no integrity problems;
- detected and repaired corrupted files; or
- found files it could not repair automatically.
Restart the computer if repairs were made. Microsoft documents the correct DISM-to-SFC sequence in itsguideto using System File Checker in Windows.
Reinstallation replaces the Snipping Tool package, while DISM and SFC address corruption in the underlying operating system. If all three operations complete successfully but Snipping Tool is still not working in Windows 11, the next section explains when PixelTaken becomes a practical long-term alternative.
PixelTaken as a Snipping Tool Alternative for Reliable Windows Screenshots
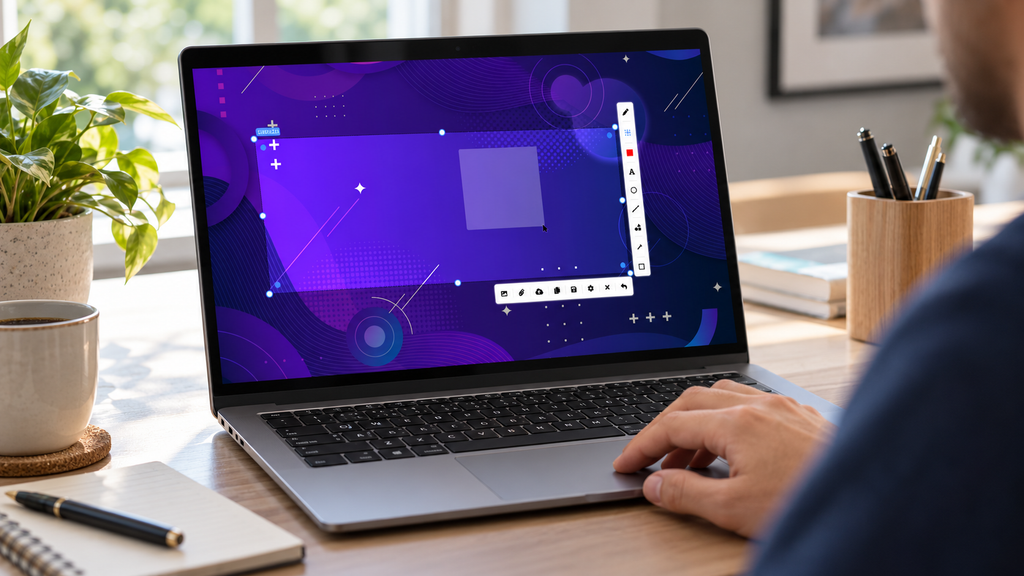
Using another screenshot application is not an additional Snipping Tool repair method. It creates a separate capture workflow for users who need to continue working when the built-in Windows utility remains unavailable or no longer meets their everyday requirements.
PixelTaken can be installed alongside the native Windows tool, so users do not have to remove or disable Snipping Tool. Because it operates through its own application package, its screenshot workflow does not depend on the condition of the Snipping Tool installation.
When a Separate Screenshot Application Makes Sense
Snipping Tool remains suitable for occasional captures that require little or no additional processing. A dedicated Snipping Tool alternative for Windows 11 becomes more useful when screenshots are regularly created for:
- software bug reports;
- visual instructions and tutorials;
- customer support responses;
- client feedback;
- internal project documentation.
The choice is not simply between two applications that perform the same task. Snipping Tool primarily provides native Windows capture features, whilePixelTakenis designed to continue the workflow after the image has been created.
Capture and Prepare Images in One Workflow
PixelTaken combines screen capture with in-app editing. Users can add arrows, lines, shapes, drawings, and text, as well as adjust colors and line widths to emphasize specific interface elements.
The application also provides a blur tool for concealing arbitrary parts of an image, including account information, names, interface elements, or other details that should not appear in a shared screenshot. The marked-up image can therefore be prepared without first transferring it to a separate graphics editor.
These capabilities make it a practical Windows screenshot capture tool for tasks in which the final image must explain an issue or direct attention to a particular part of the screen.
Keep Captures Local or Organize Them for Sharing
PixelTaken allows screenshots to remain as local files or be uploaded directly to the cloud. Uploaded captures can be accessed through a gallery, arranged into folders and workspaces, and shared through links.
This gives users two distinct workflows:
- local storage for files that should remain on the computer;
- cloud access for screenshots that need to be delivered to colleagues, clients, or support teams.
The upload option is part of the application, so a screenshot can move from capture to a shareable link without a separate file-hosting service. More details about these differences are available in the PixelTaken comparison of free Windows screen capture tools.
Use PixelTaken Alongside Snipping Tool
Switching to PixelTaken does not have to be permanent or exclusive. Snipping Tool can remain available for basic native captures, while PixelTaken handles screenshots that require annotations, privacy tools, organization, or link sharing.
PixelTaken is currently available as a free Windows screen capture tool through Microsoft Store and as a direct Windows download. For users who need more than a temporary workaround, this dedicated Windows screen capture software provides an independent and structured way to create, prepare, and share screenshots.