Linux Snipping Tool for Accessible Documentation: How to Create Clear, Inclusive Ubuntu & Windows Screenshots
Why Accessibility Matters for Linux and Windows Screenshot Documentation
When teams document workflows using a Linux snipping tool or Windows screenshot tools, accessibility is rarely a primary consideration. Yet developers, testers, designers, and technical writers do not consume documentation under identical conditions. Some work on Ubuntu, others on Windows, while many rely on small laptop screens, high-DPI monitors, or dark-mode environments that affect how visual details are rendered.
Accessibility in screenshot-based documentation is not a “nice-to-have”. It is the difference between clear, inclusive communication and confusing, error-prone instructions.
This challenge becomes especially visible in mixed environments, such as:
- developers capturing an Ubuntu desktop screenshot;
- QA engineers working with Windows screen snapshot tools;
- support teams sharing Snipping Tool Windows 10 or screen capture Windows 11 images;
- designers creating step-by-step UI tutorials using Ubuntu GNOME desktop screenshot examples.
In these scenarios, accessibility issues quickly multiply. A Linux screenshot workflow may produce high-contrast visuals, while Windows capture tools can introduce different scaling, font rendering, or colour behaviour. Readers, particularly users with visual impairments, can struggle if screenshots lack consistency or sufficient context.
Poorly prepared documentation often leads to:
- Unreadable text inside screenshots.
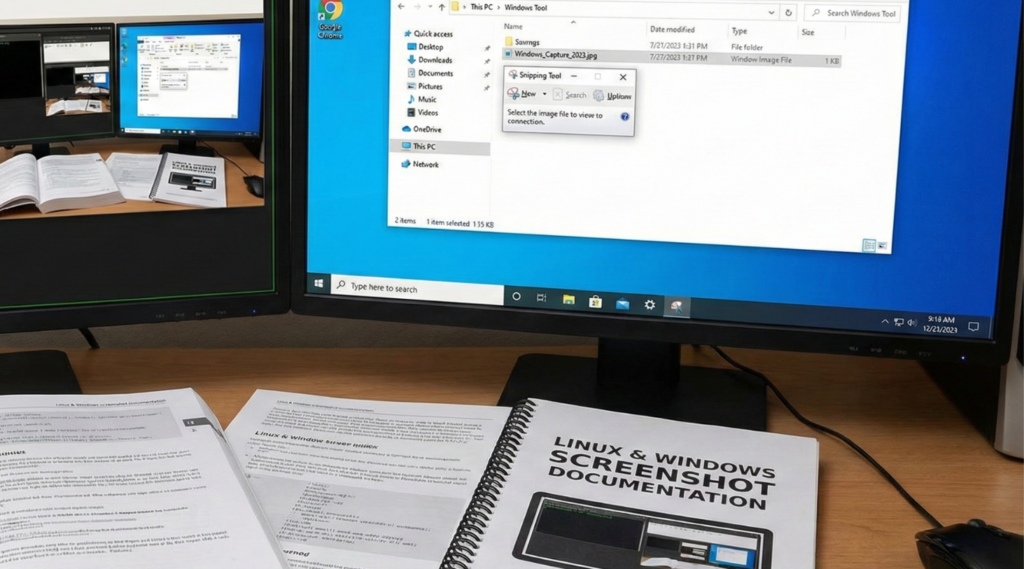
Captures made without adjusting scaling or DPI can result in tiny interface labels, especially common with Ubuntu screenshot tool defaults or full-screen Print Screen one-monitor shortcuts. - Missing context when screenshots are not described.
Without alt text or captions, a screenshot becomes inaccessible to screen readers. - Confusion in multi-monitor environments.
When authors intend to show how to take a screenshot on a single monitor but capture all displays, tutorials become visually overwhelming. - Inconsistent UI appearance.
Linux desktops (Ubuntu GNOME, Linux Lite, Arch Linux) differ significantly in themes and window managers. Windows adds further variation across Windows 10 and Windows 11 capture workflows. Without accessibility-oriented preparation, guides become harder to follow.
Why Accessibility Should Be Part of Your Screenshot Workflow
Accessible documentation ensures that every reader, whether using Ubuntu or Windows, dark mode or light mode, a large monitor or a low-resolution laptop, can follow each step with confidence.
Accessible screenshot documentation:
- Works across operating systems.
Guides built with both Linux and Windows screenshots maintain equal clarity. - Supports readers with low vision.
Proper contrast, readable text, and thoughtful cropping make screenshots usable for everyone. - Improves knowledge sharing in distributed teams.
Remote teams across Linux and Windows benefit from documentation that looks consistent everywhere. - Builds trust and professionalism.
Clear visuals signal a mature, well-maintained documentation process.
PixelTaken’s Role in Accessible Cross-Platform Documentation
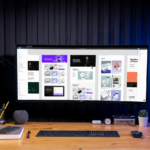
One of the biggest accessibility challenges is inconsistency between operating systems. PixelTaken helps address this by producing stable, uniform screenshots across Ubuntu and Windows. Whether capturing a Linux desktop screenshot or using a Windows Snipping Tool workflow, PixelTaken delivers clean output without DPI distortion, blur, or unexpected scaling differences, significantly simplifying accessibility efforts.
Making Screenshots Readable Across Ubuntu and Windows (Scaling, Contrast, DPI)

Resolution, Scaling, and Contrast
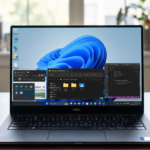
When documentation relies heavily on visuals, readability becomes as important as accuracy. Teams working across Ubuntu and Windows often discover that screenshots do not look the same everywhere. A Linux desktop screenshot may appear crisp on one system but too small or low-contrast on another, while a Windows desktop screenshot may scale differently depending on monitor DPI.
Ensuring accessibility starts with preparing both systems so visuals remain clear and consistent.
Standardise Resolution and Scaling
Before capturing screenshots:
- On Linux, different desktop environments (GNOME, KDE, Linux Lite) render fonts differently, directly affecting Ubuntu screenshots.
- On Windows, mixed DPI settings across monitors can distort UI elements, especially when attempting a screenshot on a single monitor.
Best practices:
- Use 100-125% UI scaling on Ubuntu for balanced readability.
- Avoid mixed DPI settings across Windows monitors.
- Test screenshots on both low-resolution and high-resolution displays.
Ensure Text and UI Elements Remain Legible
Whether using a Snipping tool on Ubuntu or a Windows capture workflow:
- Terminal fonts should be at least 14-16 px.
- Code editors should use readable UI scaling.
- Browser zoom should remain at or above 100%.
This prevents tiny text and improves accessibility for users with low vision.
Maintain Contrast and Theme Consistency
Linux users frequently work with dark themes or custom styles, while Windows relies on system colour profiles. To avoid inconsistency:
- Use the same light or dark theme when possible.
- Avoid heavily customised Linux themes in documentation.
- Ensure highlights, cursors, and callouts remain visible across platforms.
Frame and Crop for Clarity
Accessibility depends more on framing than on the capture tool itself:
- Capture only the relevant UI area.
- Prefer single-monitor screenshots.
- Leave sufficient whitespace around key elements.
Well-cropped screenshots reduce cognitive load and improve comprehension.
How to Use a Linux Snipping Tool and Snipping Tool Windows Together
Modern documentation rarely originates from a single operating system. Developers may capture Ubuntu screenshots, QA teams attach Windows snapshots, and designers review UI states from different platforms. The goal is not to standardise systems, but to standardise the process.
A shared workflow ensures screenshots feel cohesive, regardless of whether they were captured using a Linux or a Windows snipping tool.
Establish a Cross-Platform Capture Process
Define internal rules for:
- When to capture full screen vs application windows.
- Which formats to use (PNG, WebP, JPG).
- When cropping or annotation is required.
Use Consistent Naming Conventions
Avoid file chaos by adopting a predictable structure:
- ubuntu-settings-01.png;
- windows-display-01.png;
- permissions-panel-v2.png.
Align Annotation Style
Consistency matters more than creativity:
- Use one highlight colour.
- Standardise arrow styles and line thickness.
- Avoid long text inside images.
Create a “Screenshot-Ready” UI State
Align UI conditions instead of system settings:
- consistent light/dark mode;
- similar zoom levels;
- predictable panel states.
Validate Before Publishing
Before release:
- Check visual consistency between Ubuntu and Windows screenshots.
- Confirm annotations are readable at different resolutions.
- Verify alt text is present.
PixelTaken supports this workflow by producing consistent screenshots across platforms, reducing manual adjustments and review cycles.
Alt Text and Captions for Ubuntu and Windows Screenshots
Even the most polished captures become meaningless if readers don’t understand what they are looking at. Accessibility isn’t just about making visuals clear; it’s about making them interpretable. Alt text, captions, and semantic labels play a crucial role, especially for users relying on screen readers, those viewing documentation in low-bandwidth mode, or anyone who cannot see subtle UI details.
Writing Effective Alt Text for Linux and Windows Screenshots
Alt text is not a literal description of the pixels. It should tell the user why the screenshot matters, not simply what is in it.
Bad example:
“A screenshot of Ubuntu Settings.”
Good example:
“Ubuntu Privacy Settings panel showing disabled location tracking.”
Guidelines:
- Describe purpose, not just appearance.
- Mention OS only when relevant (e.g., aUbuntu screenshotshowing GNOME vs. Windows 11 UI).
- Keep alt text concise yet informative (approximately 100-150 characters).
- For code-related images, summarise the outcome or error message shown.
This makes both Ubuntu Snipping Tool images and Windows screenshot captures understandable even without visuals.
Using Captions to Clarify Context and Intent
Captions sit below the image and help users who skim content. They are especially valuable in tutorials where multiple screenshots appear in sequence.
Captions can:
- Clarify what step the screenshot represents.
- Highlight a specific UI element without relying purely on visual cues.
- Provide compatibility notes for Ubuntu vs Windows workflows.
- Help non-technical readers follow the flow of the tutorial.
Examples:
- “Step 3: Open the Extensions tab in Ubuntu GNOME to adjust keyboard shortcuts.”
- “Windows 11 Settings panel where clipboard history is enabled.”
Captions make your documentation more self-contained, especially when Ubuntu screenshots and Windows desktop screenshots appear side by side.
Using Labels and Callouts with Accessibility in Mind
Labels (short text markers inside or near the screenshot) must enhance clarity, not replace it.
Best practices:
- Use brief, high-contrast labels such as “Toggle On”, “Select Folder”, or “Open Terminal”.
- Avoid long sentences inside the image; complex explanations belong in the paragraph, not the screenshot.
- Keep font sizes readable for low-vision users.
Whether added to a screen capture Windows image or a GNOME-based Ubuntu screenshot tool output, labels should guide the reader without overwhelming the visual.
Make Screenshots Searchable and SEO-Friendly with Descriptive Filenames
Filenames often get overlooked, yet they help both accessibility and SEO:
- Bad: Screenshot-2024-12-01.png
- Good: ubuntu-privacy-settings-panel.png
- Better: windows11-display-brightness-settings.png
Benefits:
- Users navigating documentation folders understand each image instantly.
- Search engines interpret screenshot relevance.
- Screen-reader tools may use filenames when alt text is missing.
This works equally well for screenshot single monitor, multi-window captures, or UI steps in long tutorials.
Provide Text Alternatives for Visual-Only Information
Sometimes the screenshot contains information not written anywhere else: a shortcut, error message, or configuration state. To ensure accessibility:
- Repeat essential text elements outside the screenshot.
- Add the command or setting directly in the paragraph.
- Do not rely on colours or arrows alone to convey meaning.
This helps users who cannot view the screenshot clearly and ensures your screenshot remains understandable in plain-text mode.
Why PixelTaken Makes Accessible Documentation Easier
PixelTaken allows you to annotate consistently across Ubuntu and Windows, ensuring alt text and captions remain meaningful regardless of the OS. With clean edges, uniform highlights, and reliable single-monitor captures, PixelTaken eliminates common DPI or rendering issues that complicate accessibility work. Instead of manually adjusting each image, teams can focus on writing clear descriptions and captions that truly support readers.
Designing Tutorials for Mobile, Low-Res, and Dark Mode
A great tutorial is more than a sequence of screenshots. It is a structured learning path that users can follow regardless of device, operating system, or visual preferences. Modern documentation must survive mobile viewing, low-resolution monitors, dark-mode environments, and the diverse tooling of remote, mixed-OS teams.
1. Structure Tutorials for Mobile-First Readability
A significant portion of users open how-to articles on their phones while troubleshooting.
To make tutorials mobile-friendly:
- Keep steps short: one action per block.
- Place each screenshot immediately after the action it illustrates.
- Use vertical flow; avoid unnecessarily wide images.
- Add small “micro-summaries” under each screenshot (e.g. “This is where you click ‘Permissions’.”).
Mobile readers should not need to zoom into an Ubuntu screenshot to understand the steps.
2. Reduce Cognitive Load with Clear Action Pathways
Accessibility isn’t only about vision; it also affects how users process information.
To support users with neurodivergence or cognitive fatigue:
- Maintain predictable patterns (Action – Screenshot – Result).
- Avoid mixing different OS screenshots in the same step.
- Add transitional phrases (“Next, open…”, “Now select…”).
- Break complex tasks into independent subflows.
This makes a tutorial built from Snipping Tool for Ubuntu captures just as intuitive as one built from Snipping Tool Windows captures.
3. Provide OS-Specific Variants Only When Necessary
Mixed Ubuntu + Windows teams often worry about duplicating tutorials. However, most instructions do not require separate versions.
Use OS-specific screenshots only when:
- interface labels differ significantly;
- file paths or system dialogues are not comparable;
- a user might get “blocked” by platform differences.
Otherwise, unify the steps and simply note:
“Ubuntu users will see this panel in GNOME; Windows users will see it under Settings – Privacy.”
This keeps tutorials clean and avoids overwhelming users with unnecessary images.
4. Design Tutorials That Survive Dark Mode and Theming Variations
Instead of modifying screenshots themselves (already covered in earlier sections), focus here on tutorial design patterns:
- Avoid referring to UI elements by colour (“click the blue icon”).
- Always reference names, placements, or shapes instead.
- Add short text descriptions near screenshots so users in dark mode understand what they should find, even if visuals look different.
For example:
“Look for the gear-shaped Settings button (Ubuntu GNOME shown here).”
This method works whether the reader views a screen capture of Windows 11 or an Ubuntu screenshot tool output.
5. Use Text Reinforcement to Support Users with Limited Visual Access
Some readers cannot fully rely on screenshots due to visual impairments or small displays.
To support them:
- Repeat the essential outcome of each step outside the image.
- Provide shortcut keys in text (e.g. “Press Ctrl+Shift+T to open Terminal”) even if the screenshot shows the menu click.
- Offer a one-sentence summary after multi-image sequences.
This ensures that even if a documentation image is hard to view, the tutorial remains usable.
6. Where PixelTaken Helps in Cross-Device, Cross-OS Tutorial Design
PixelTaken supports accessible tutorial design by ensuring that screenshots from Ubuntu and Windows look consistent enough to support unified instructional text. With reliable cropping, clean rendering, and predictable output, PixelTaken allows creators to focus more on designing clear user journeys and less on correcting screenshot inconsistencies.
PixelTaken helps documentation teams build tutorials that feel coherent—whether users are on mobile, dark mode, low-resolution displays, or switching between Linux and Windows environments.
Checklist: Accessible Documentation with Snipping Tool Ubuntu + Snipping Tool Windows
A tutorial becomes truly accessible only after it has been reviewed from multiple angles: readability, navigation, device constraints, and user diversity. The checklist below focuses on practical quality-assurance steps, ensuring your documentation is usable for everyone, regardless of OS, skill level, or visual ability.
This list applies equally to workflows built with an Ubuntu screenshot tool and Windows Snipping Tool captures.
1. Verify That Every Step Can Be Completed Using Keyboard Navigation
Some users rely on keyboards instead of pointing devices. Before publishing:
- Ensure every action described in the tutorial has a keyboard equivalent.
- Add shortcut notes where relevant (search, open settings, switch windows).
- Avoid instructions like “click the tiny icon” without alternatives.
This improves accessibility for users with motor impairments and helps advanced users work faster.
2. Ensure No Step Relies Solely on Colour or Visual Cues
A major accessibility issue is depending on colours or subtle UI differences.
Confirm that your tutorial never says:
- “Press the green button.”
- “Select the highlighted area.”
- “Click the icon that looks slightly brighter.”
Instead, reference labels, shapes, positions, or system names independent of whether the image is from Ubuntu GNOME or Windows 11.
3. Check That Screenshot Crops Match the User’s Real Environment
Many tutorials fail because screenshots show UI that the user does not see.
Before publishing:
- Remove unnecessary panels, pop-ups, or notifications.
- Ensure screenshots reflect default settings (no exotic themes or unusual dock placements).
- Use consistent layouts for both Ubuntu and Windows desktop screenshot images.
Clarity begins with authenticity.
4. Validate That the Tutorial Works for First-Time Users
Accessibility also includes cognitive clarity. Test the guide on someone who has never completed the task.
Ask:
- Do they understand where each step begins and ends?
- Is any terminology unclear (e.g. “workspace”, “registry”, “GNOME extension”)?
- Do they know when a multi-step action is completed?
If a new user struggles, the tutorial needs refinement, even if the screenshots are perfect.
5. Confirm That All Images Load Quickly and Maintain Visual Fidelity
Performance matters:
- Ensure images aren’t oversized (avoid 5-10 MB PNGs).
- Compress without losing clarity.
- Provide WebP versions for fast-loading content.
- Make sure screenshot files remain crisp after compression.
Accessibility includes fast loading for users with limited bandwidth.
6. Add Semantic Structure: Headings, Lists and Landmarks
Screen readers rely on structure, not visuals. Before publishing:
- Use clear step numbering.
- Break long paragraphs into shorter, scannable sections.
- Add headings that describe the action, not just the topic.
- Ensure tables, code blocks, and lists contain semantic labels.
A well-structured tutorial supports visually impaired users and improves SEO.
7. Provide a “Recovery Path” for Users Who Make Mistakes
Accessible documentation anticipates errors.
Include:
- What to do if the user opens the wrong settings panel?
- How to reset changes on Ubuntu or Windows.
- Safe fallback steps for beginners.
This makes tutorials fail-safe and an essential part of accessibility.
8. Cross-Test the Tutorial in Multiple Viewing Conditions
Before publishing, review the article in:
- light mode and dark mode;
- small laptop screens;
- mobile browsers;
- high-contrast accessibility settings;
- zoomed interface (125-150%);
- different DPI environments (Linux vs Windows scaling).
This ensures your images remain usable everywhere.
9. PixelTaken as the Final Quality-Assurance Layer
PixelTaken simplifies accessibility QA by producing consistent, clear screenshots across both Ubuntu and Windows. Because the output is uniform and predictable, teams can confidently test tutorials in different environments without worrying about inconsistent borders, scaling artefacts, or unreadable micro-details.
Accessible tutorials are not just about screenshots; they’re about removing barriers for every reader, regardless of device, vision, operating system, or experience level. By combining thoughtful structure, clear language, and consistent visuals across Ubuntu and Windows, teams can create documentation that works for everyone. And with PixelTaken ensuring clean, uniform captures from anyLinux snipping toolor Windows workflow, creators can focus on clarity and inclusivity instead of fighting screenshot inconsistencies.
Accessible documentation isn’t an extra step; it’s the foundation of a truly user-friendly product.